7 Tips for Buying a Shipping Container Shed
A shipping container shed can look like a simple storage solution. In practice, the purchase involves structure, transport, ventilation, drainage, and local approval. A weathered steel box may hide corrosion beneath paint, especially around the roof, doors, and floor frame.
UNCTAD’s Review of Maritime Transport 2024 states that over 80% of global merchandise trade moves by sea. That scale explains why used containers are widely available, but availability does not guarantee suitability. The World Bank’s Logistics Performance Index 2023 also highlights reliability and delivery predictability as important supply-chain factors. Those concerns matter when a crane truck must reach your property.
This guide presents seven practical tips for buying a shipping container shed. It examines container grade, dimensions, site access, foundations, moisture control, insulation, and security. ISO 668 provides internationally recognized container dimensions, yet internal space can vary after doors, framing, and insulation are added. Measure twice.
Details matter.
An experienced inspection should check door seals, locking bars, corner castings, roof dents, floor damage, and chemical odors. Delivery costs can also exceed expectations when roads are narrow or ground conditions are soft. I would not assume a “wind and watertight” label means a perfect building envelope. It usually describes basic cargo protection, not comfortable long-term occupancy.
A reliable buying decision balances the container’s condition, intended use, climate, installation method, and total project cost. Some plans look inexpensive on paper. They become less attractive after ventilation, electrical work, drainage, and permits are included. These seven tips aim to make those compromises visible before payment.
Define the Shed’s Purpose, Size, and Local Requirements
A shipping container shed works best when its purpose is defined before measurements begin. Will it hold garden tools, bicycles, machinery, or seasonal furniture? Each use changes the layout, ventilation, lighting, and security needs. A tool shed may need wall storage and a wide door. A workshop needs stronger flooring, power planning, and comfortable headroom. Keep moisture in mind. Condensation can damage metal tools quickly. That detail is often missed.
Measure the items, not just the available ground. Add clearance for open doors, walking space, shelves, and future purchases. A rough sketch helps, but it can still be wrong. Leave room for roof drainage and safe access around the shed. Check the delivery route too. Narrow gates, low branches, and soft ground can prevent placement. The shed may fit the yard but fail at the entrance. Choose size based on daily use, not appearance. Oversizing wastes money, while undersizing creates clutter.
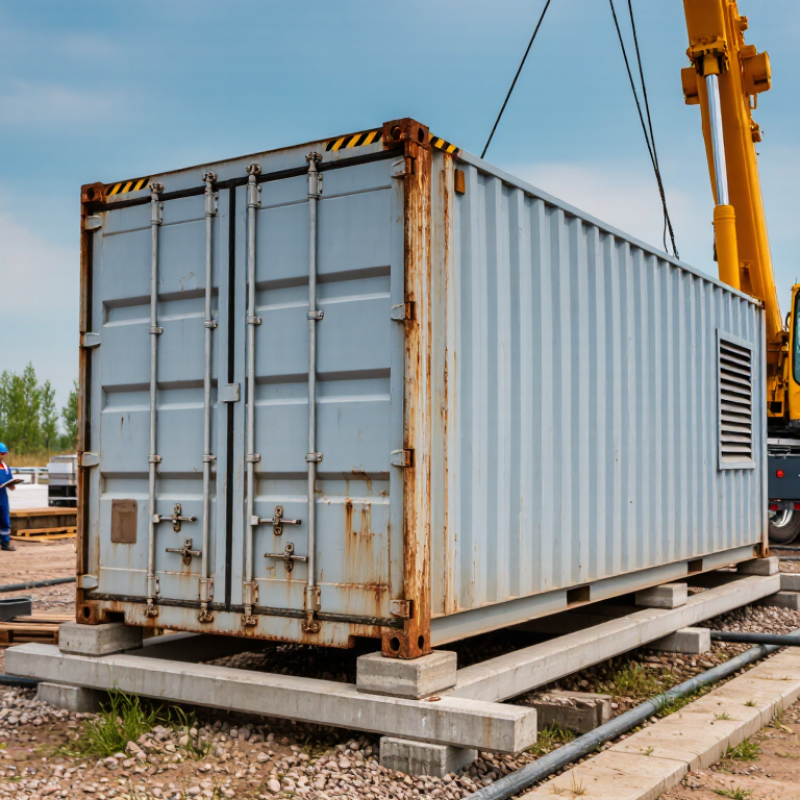
Local requirements should be checked before ordering. Rules may cover permits, setbacks, height, foundations, drainage, fire separation, and property boundaries. Contact the local building office and request written guidance when possible. Also check underground utilities before digging or anchoring. Soil conditions matter. A level, stable base reduces shifting, trapped water, and uneven doors. In wet areas, raised supports and airflow beneath the container may help. Do not assume a temporary shed avoids approval. Regulations differ between towns, and online advice can be outdated.
Choose the Right Container Type, Condition, and Structural Features
7 Tips for Buying a Shipping Container Shed
Choose the container type before comparing prices. A standard dry container usually suits storage, while a high-cube model offers extra headroom. Measure your equipment, shelving, and door clearance carefully. Tip 1: Sketch the interior first. Tip 2: Check the external dimensions against your site access. Narrow lanes, low branches, or soft ground can make delivery difficult. I once underestimated turning space. That mistake added avoidable site work.
Condition matters more than fresh paint. Inspect the roof for dents, pinholes, and standing-water marks. Open every door and test the locking bars. Tip 3: Prefer a unit with a sound, level floor. Tip 4: Ask whether repairs involved welding, patch plates, or chemical treatment. Rust around corner posts deserves attention. Surface corrosion may be manageable, but deep corrosion can weaken the frame. Photos help, though they never replace an in-person inspection.
Structural features determine whether the shed stays useful. Tip 5: Confirm that ventilation openings are included or professionally installed. Tip 6: Examine the roof and wall panels before adding insulation or electrical systems. Cutting steel without proper reinforcement can reduce strength. Tip 7: Plan anchoring, drainage, lighting, and secure access with a qualified installer. Check local planning and safety requirements before delivery. My own plans have changed after measuring twice; that is inconvenient, but cheaper than correcting a poorly positioned shed.
Set a Budget for Purchase, Delivery, Modifications, and Installation
A shipping container shed looks affordable until every cost enters the spreadsheet. Set a complete budget before choosing a unit. Include the container, inspection, taxes, delivery, site preparation, modifications, and installation. A used container may have dents, rust, or damaged doors. Newer units usually cost more, but repairs can be smaller. Ask for photos, dimensions, and a written condition report. Do not trust a low quote too quickly. Costs drift.
Delivery deserves careful planning. Measure gate width, overhead clearance, turning space, and ground firmness. A truck may need extra room to unload safely. Soft soil can require gravel, concrete pads, or compacted blocks. These preparations add labor and materials. Request a delivery estimate listing distance, equipment, waiting time, and access fees. Weather can also delay placement. Keep a reserve of 10 to 20 percent for surprises, although local prices may differ. Plan carefully.
Modifications can change the budget fast. Ventilation, windows, insulation, shelving, lighting, and electrical work should be priced separately. Plan door placement around bicycles, tools, and lawn equipment. A small mistake becomes expensive after cutting steel. Installation may include leveling, anchoring, foundation work, and final checks. Confirm who handles each task and whether permits or inspections apply locally. I once underestimated site grading; the container arrived, but the prepared area was not level. That delay taught me to price the ground before the shed.
Inspect the Container and Verify the Seller’s Reliability
A used shipping container can look sound from a distance, yet small defects may become expensive shed repairs. Walk around it in daylight and inspect every corner post, roof seam, and lower rail. Look for deep rust, fresh paint over corrosion, dents, and patches that hide damage. Open and close both doors several times. They should move smoothly and meet the frame evenly.
Check the floor carefully. Soft boards, oil stains, or a strong chemical smell deserve attention. Water marks inside may reveal roof leaks, even when the container is dry during your visit. During one inspection, I noticed daylight near a door gasket that was easy to miss in photographs. Take your time. Ask for clear images of the roof, underside, interior, and identification markings. A basic moisture check after rainfall can also expose weak seals.
Seller reliability matters as much as steel condition. Request a written quotation showing the container grade, exact dimensions, delivery cost, unloading duties, and payment terms. Confirm the seller’s physical address, business registration details, and recent customer references through independent channels. Avoid pressure to pay the full amount before inspection or delivery arrangements are documented. A reputable seller should answer specific questions without changing the story. Keep every message and agreed specification. I prefer a small, conditional deposit, although this approach may not suit every transaction. If the seller refuses reasonable checks, walk away. Reliable service leaves a clear paper trail.
7 Tips for Buying a Shipping Container Shed: Verify Standard Dimensions
Before buying, compare the seller’s listed measurements with common ISO dry-container dimensions.
Check the container’s external length, width, and height, then inspect the doors, roof, floor, corner posts, and frame for damage or corrosion.
Ask the seller for clear photos, identification details, delivery terms, and written condition information before making payment.
Reference: ISO 668 nominal external dimensions for common dry freight containers.